Arduino LiFePO4 Battery Charger Circuit Engineering Projects
In this project we will build a Two Stage Battery charger (CC and CV) that could be used as to charge Lithium ion or lithium polymer batters. The battery charger circuit is designed for 7.4V lithium battery pack (two 18650 in Series) which I commonly use in most robotics project but the circuit can be easily modified to fit in lower or slightly.
ArduinoControlled 12V Automatic Battery Charger Full DIY Project
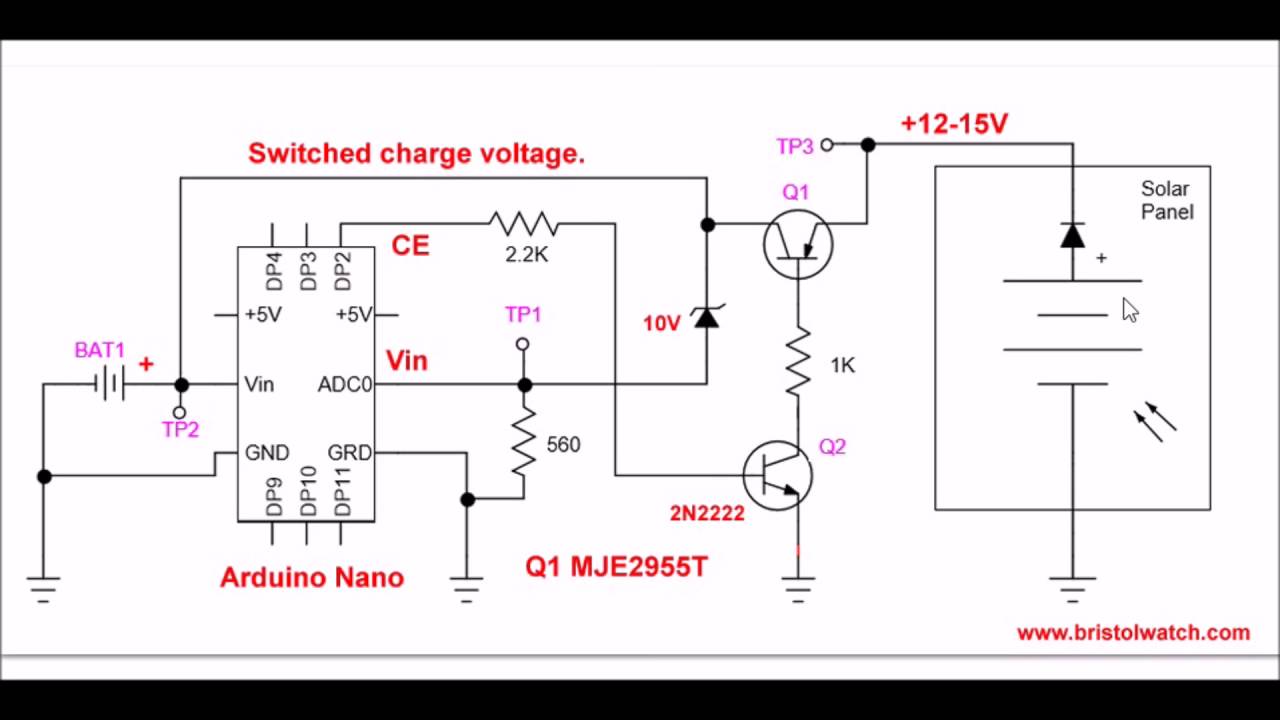
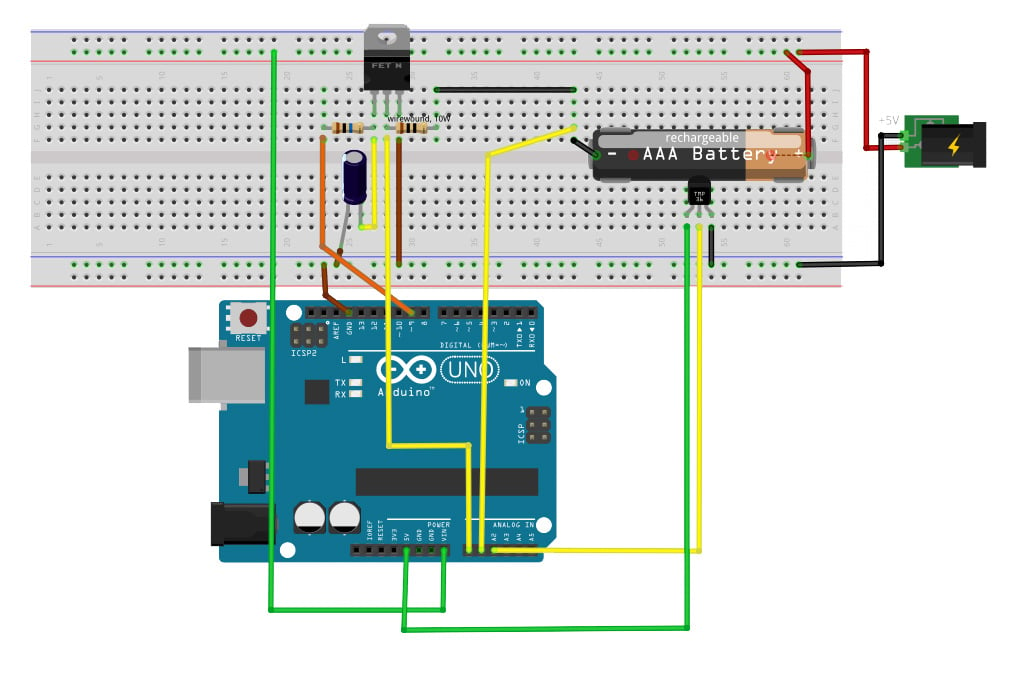
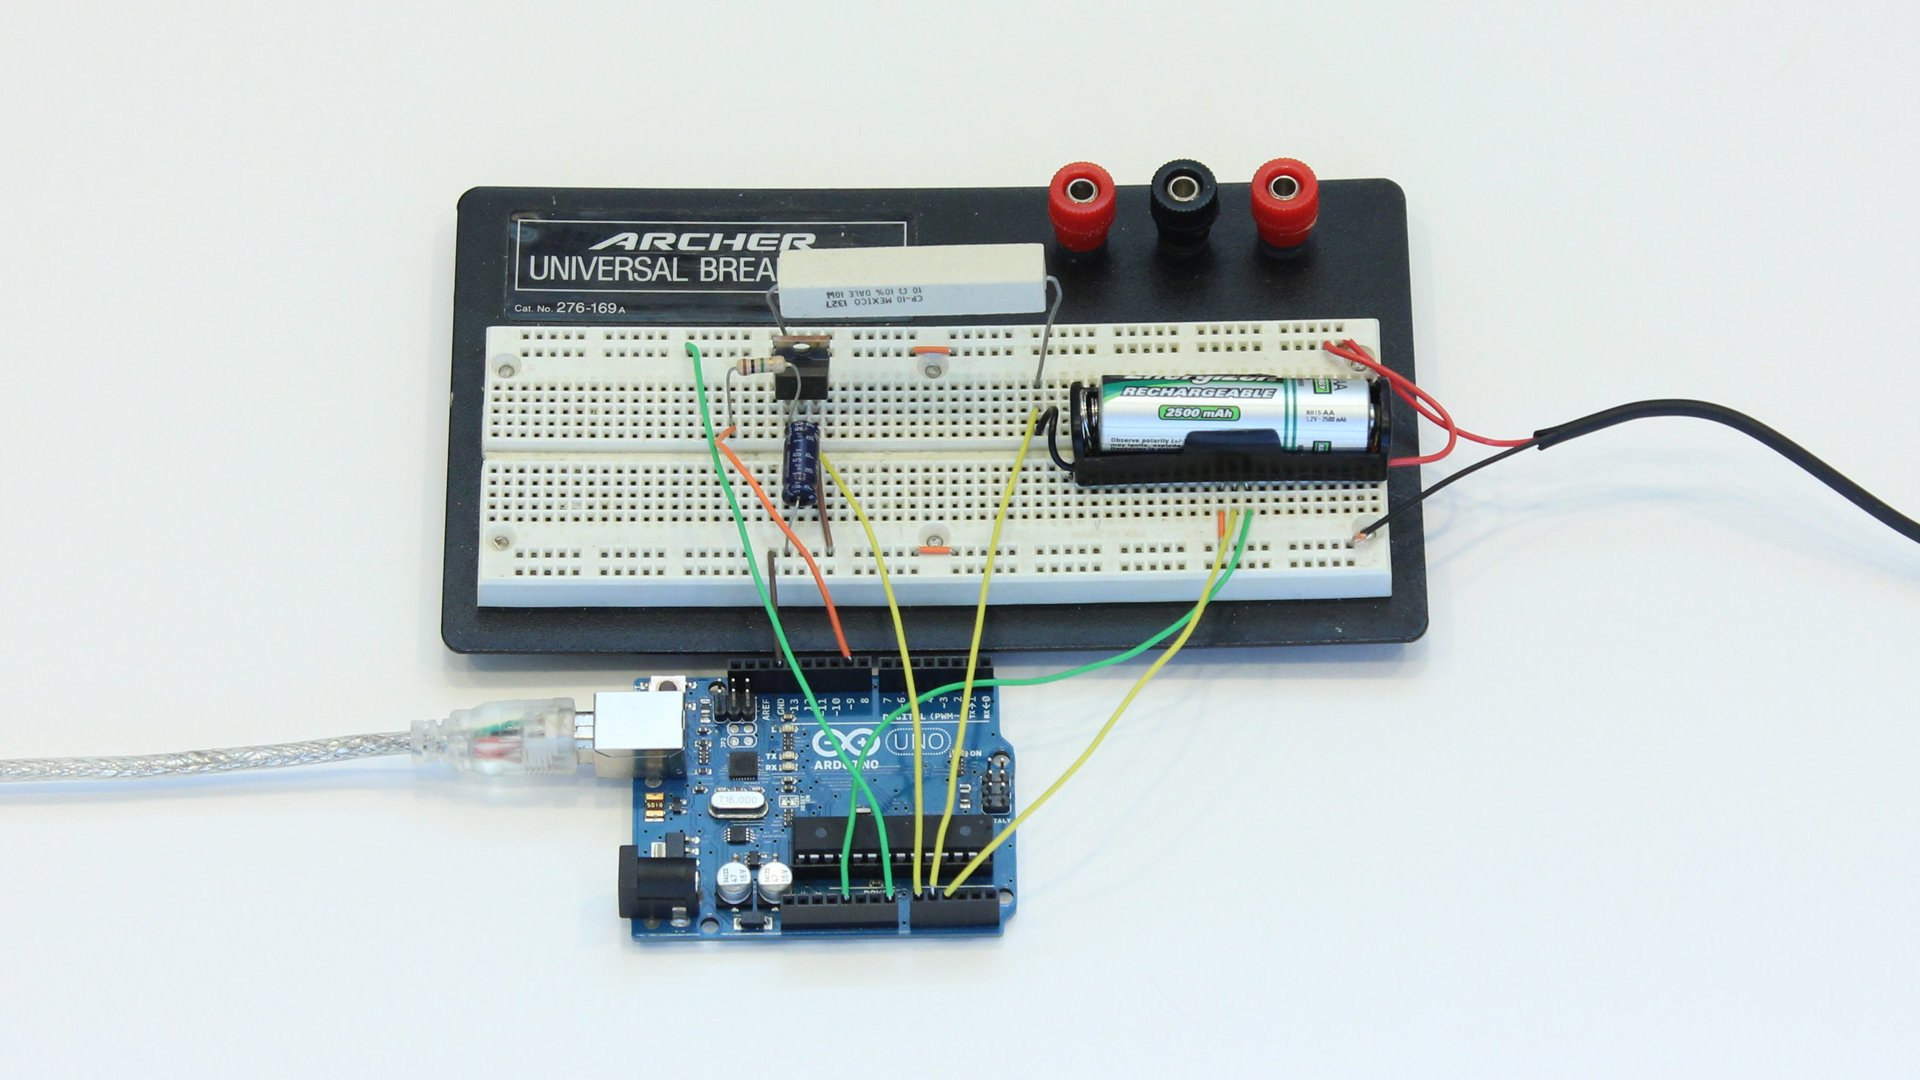
The 5V source charges the battery through a 10 ohm power resistor and a power MOSFET. The MOSFET sets how much current is allowed to flow into the battery. The resistor is included as an easy way to monitor the current. This is done by connecting each terminal to analog input pins on the Arduino and measuring the voltage on each side.

Create an Arduino Controlled Battery Charger Projects
The battery charger algorithm is as follows. The DACs receive from the Arduino UNO the information by I2C of the voltage that they must generate, one ADC is used for the high side current source and the other DAC, for the voltage follower, since the events are exclusive, one ADC works and the other does not, one in the constant current phase and the other in the constant voltage phase.

Arduino Controlled 12V Battery Charger Circuit YouTube
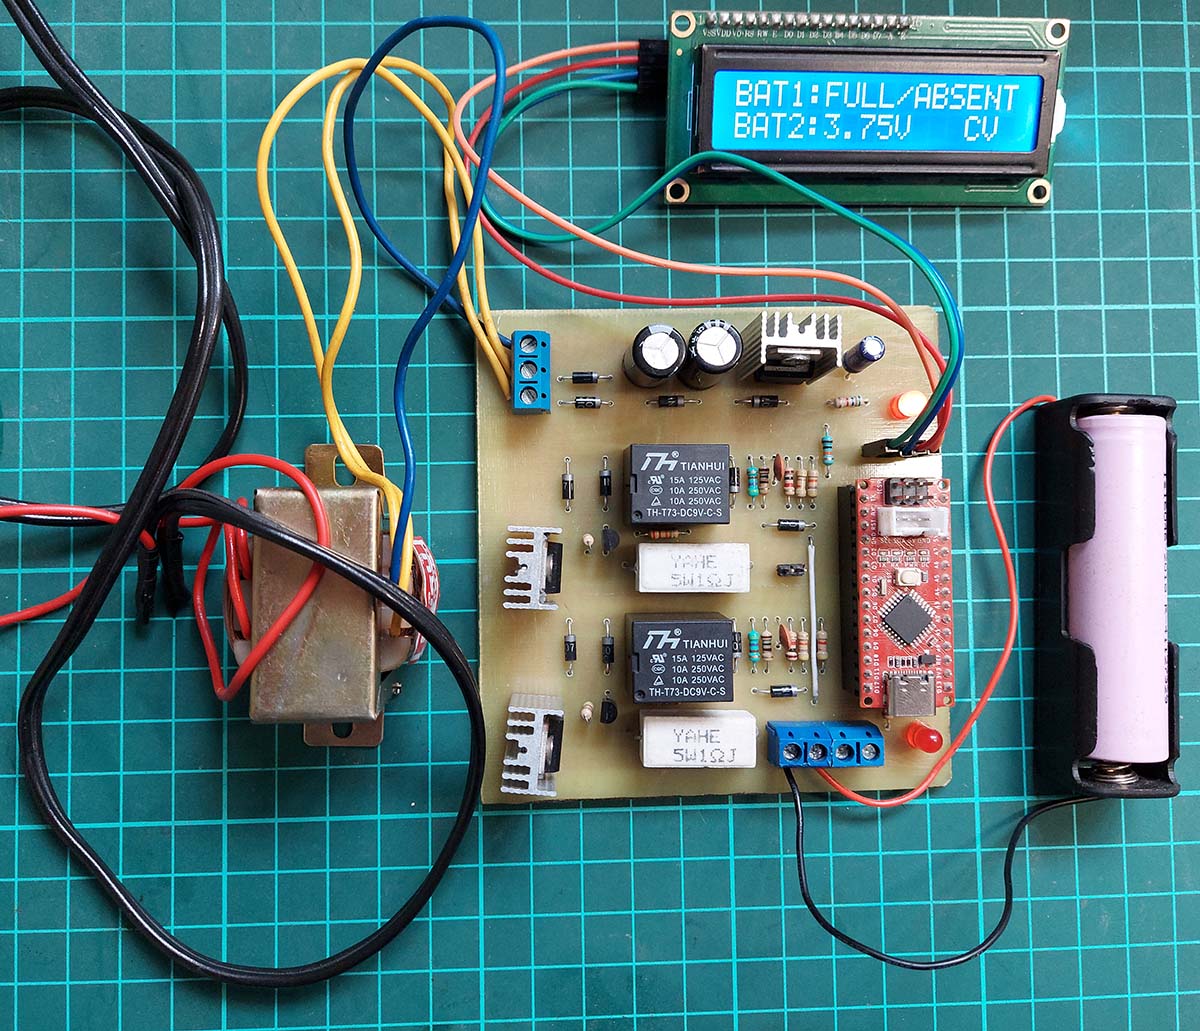
Features of the proposed Li-ion / Li-Po battery charger: Li-ion Battery charger using Arduino. Full battery detection and auto cut-off. Auto timer cut-off. Overcharging current cut-off. Auto current sensor calibration. Real time current consumption on display. CC / CV modes indication on display.
Arduino Controlled 12V battery charger circuit Engineering Projects
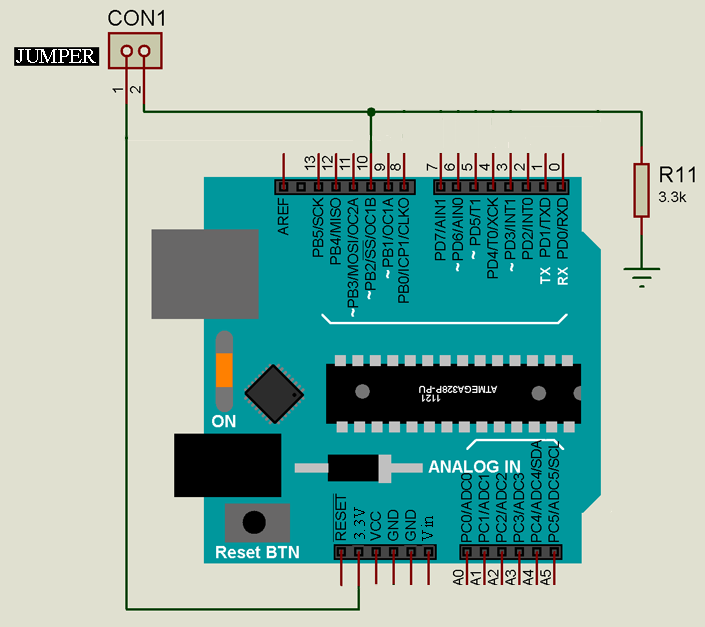
BATTERY charger circuit. Using Arduino. General Electronics. Joes October 23, 2013,. So ignore that ground symbol in the circuit. Use the side on the (-) terminal of the battery as ground for the circuit you are supplying. To clarify: Leave everything else connected exactly as it is. You are only moving the ground connection to the right.

Arduino Controlled 12V battery charger circuit Engineering Projects
An Arduino microcontroller can be used to control a battery charger circuit that charges a 12V lead-acid battery. The basic idea is to use the Arduino to monitor the voltage and current of the battery, and then use that information to control the charging process. Here is an example of Arduino code for a simple 12V battery charger:
Simple Arduino Battery Charge Controller YouTube
Features of Arduino LiFePO4 Battery Charger. Parallel charging of two 3.7V LiFePO4 batteries. LED Indication and Display System. Display of CC/CV modes. Max current of 1A in CC modes. A constant voltage of 4.2V in CV modes. Checkout the other battery charger circuit posted in bestengineeringprojects.com. 12V Lead Acid Battery Charger Circuit.
Arduino Controlled 12V battery charger circuit Engineering Projects
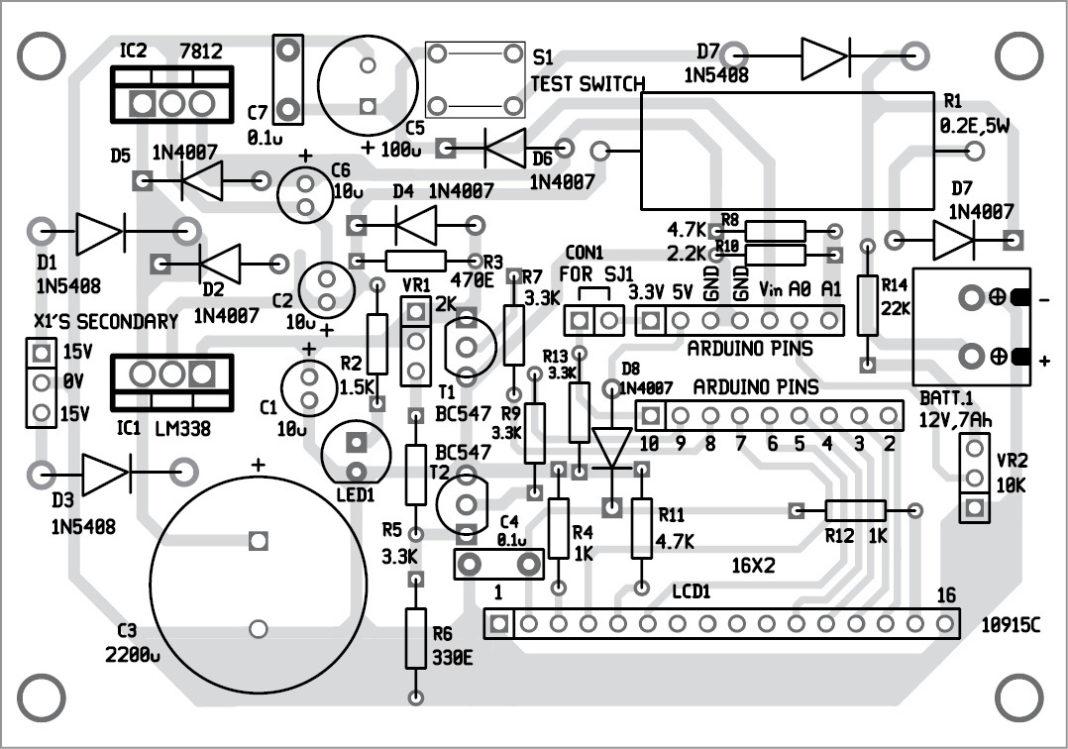
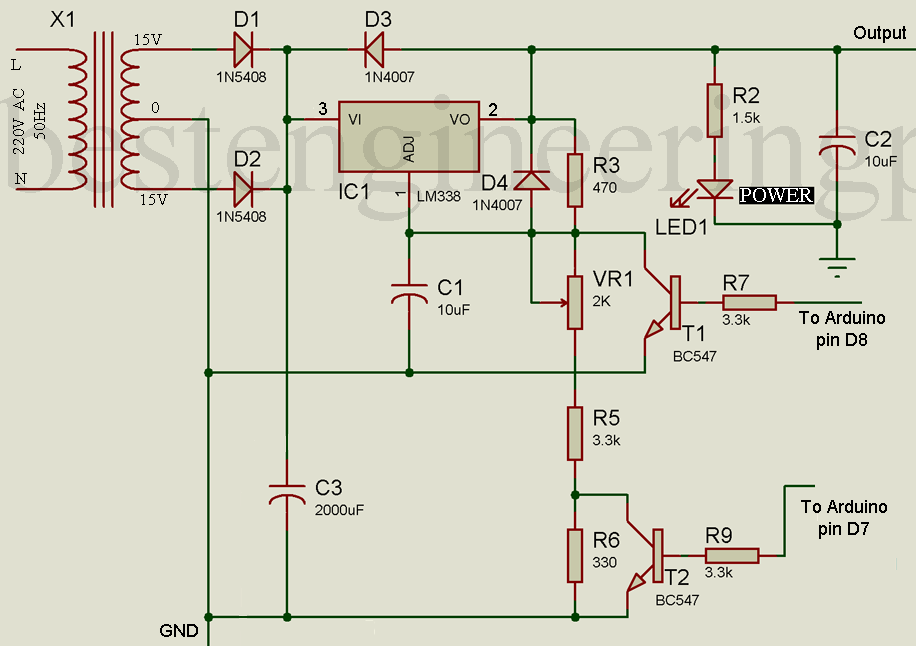
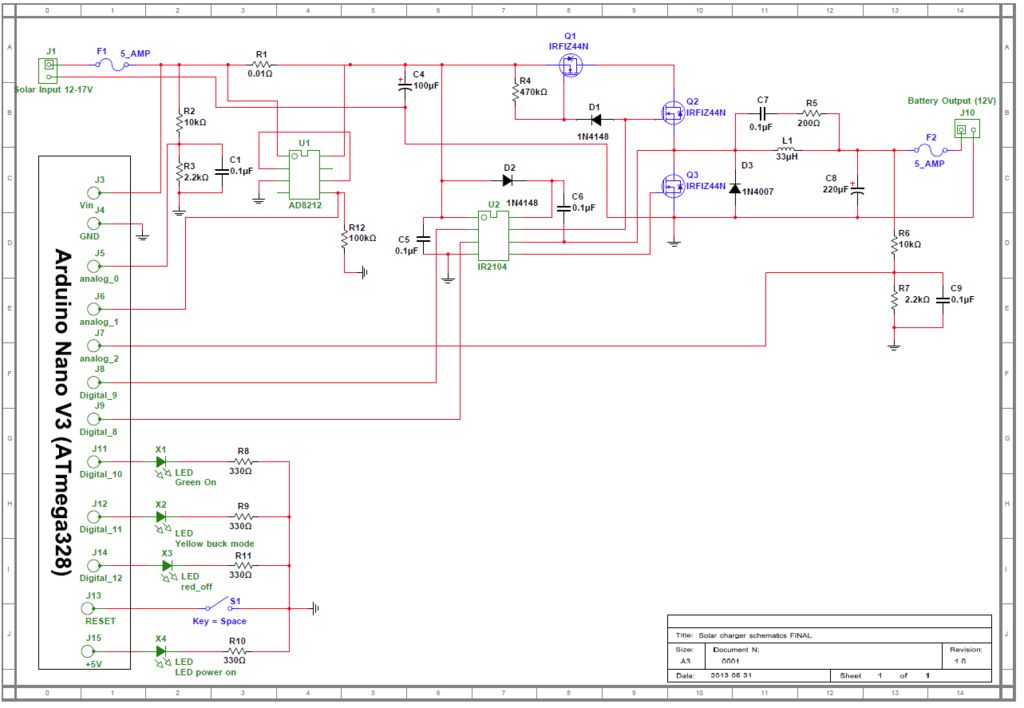
The schematic diagram of the battery charger and the Arduino codes are attached below in the Appendix. Acknowledgement This charger is developed on the basis of the project in [4]. Appendix A1. Some further explanation about the circuit design In the circuit, R2 is to help measure the current through the battery, which can be obtained from the
Create an Arduino Controlled Battery Charger Projects
Embark on Your Arduino Journey: Everything You Need to Begin! Dive into the world of electronics and programming with our selection of kits. Designed to provide beginners and experienced enthusiasts alike with an immersive learning experience.

Arduino Controlled 12V battery charger circuit Engineering Projects
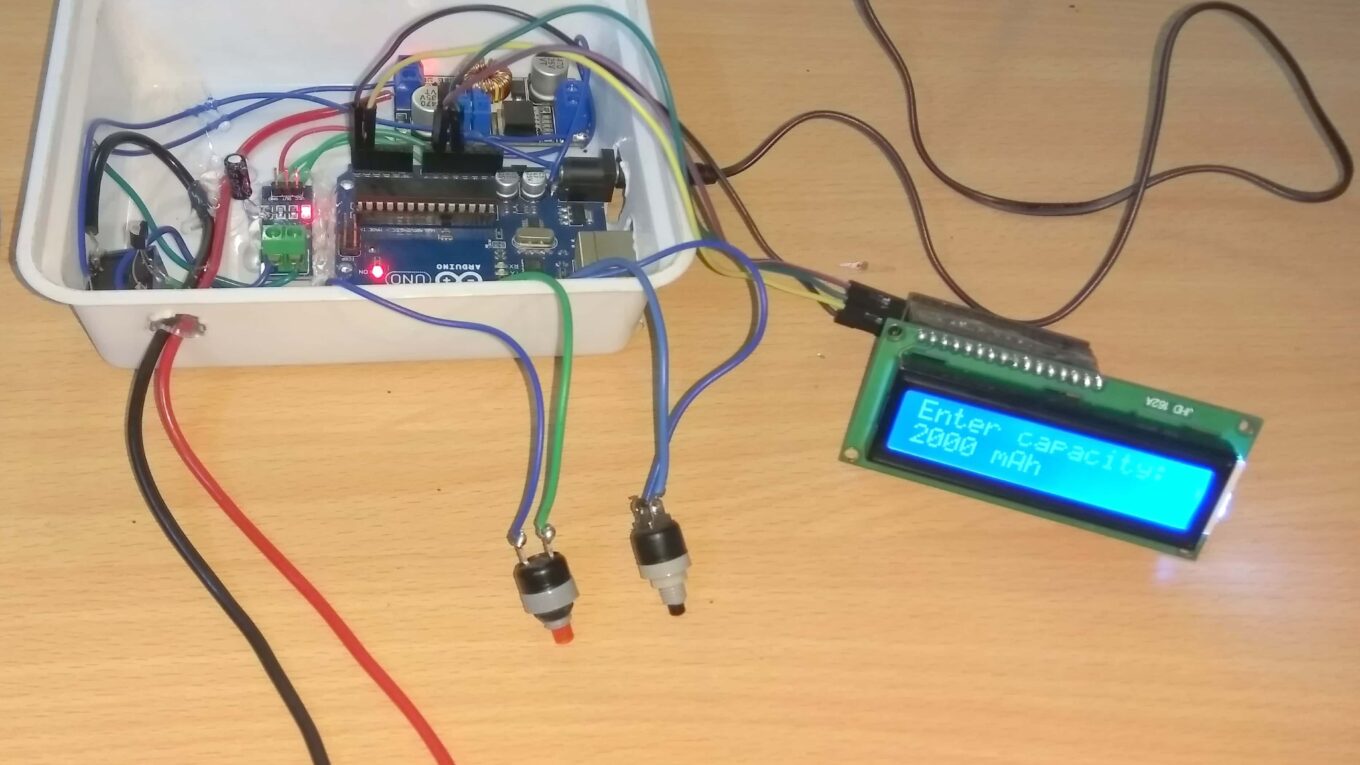
Lithium Ion batteries need a Constant Current (CC) / Constant Voltage (CV) charge. It starts out in CC, then switches to CV to finish once the battery comes up to a specified voltage. If you have a 2000mah battery, you typically want a charge current of half that, so multiply .5 * 2000mah = 1000 ma charge current (check your battery datasheet.

Arduino Controlled Battery Charger
How to operate this lead-acid battery charger: Step 1: Set CC / CV buck converter's output to 14.4V for 12V battery or 7.5V for 6V battery. Step 2: Set CC / CV buck converter's output to 0.2 x Ah. Step 3: Press INC (increment) button to set the battery capacity. You can set from 4500 mAh to 15000 mAh.
Arduino Controlled 12V battery charger circuit Engineering Projects
This charger's circuit design is a basic Arduino controlled power supply. Our circuit is powered by a 5 volt regulated voltage source like an AC adapter or an ATX computer power supply. Most USB ports won't work for this charger because of their current limitations. The battery is charged by the 5V source through a power MOSFET and a 10 ohm.
Arduino powered Solar Battery Charger Use Arduino for Projects
Arduino Power Supply. If you need a power source to integrate into an existing project or board, Adafruit's PowerBoost 500C and 1000C are excellent options. Here are a few features of the Adafruit PowerBoost 500C and 1000C: - Charger circuit and boost converter. Both feature a built-in LiPo battery charger circuit, along with a boost.
Create an Arduino Controlled Battery Charger LEKULE BLOG
Looking For Battery Charger Arduino? We Have Almost Everything On eBay. But Did You Check eBay? Check Out Battery Charger Arduino On eBay.

Arduino Lithiumion Battery Charger DIY Electronics Projects
Circuit Diagram. The the following figure shows the Li-Ion charger circuit diagram. Lithium-Ion battery charger circuit diagram (click to enlarge) The above schematic, the 19.5 V of the power supply are stepped-down to 5 V by the 7805 voltage regulator U1. The 5 V is used for powering the Arduino board.
Arduino 12V LeadAcid Battery Charger DIY Electronics Projects
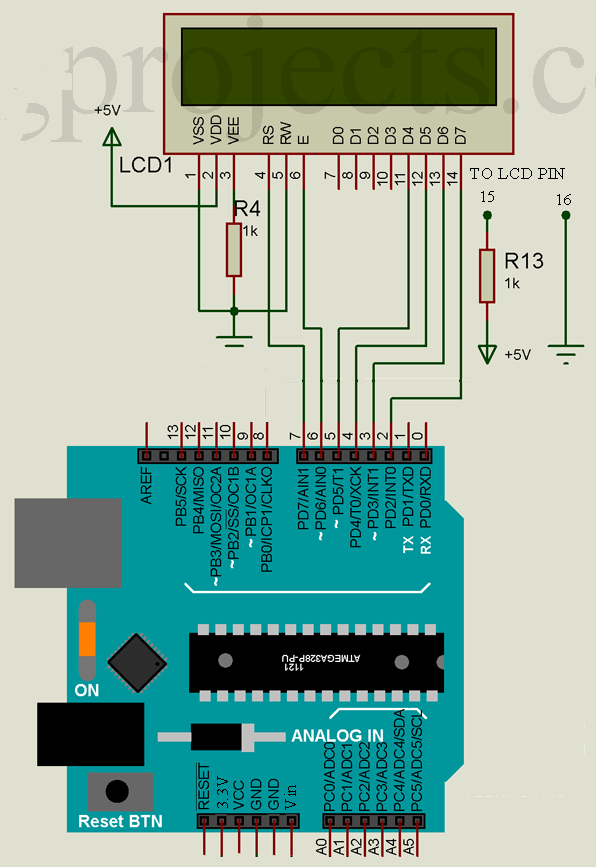
Because the LED's are an Arduino feedback of the choice made, it may take a little delay before the appropriate LED comes on. The sketch recognizes, via the charge Voltage divider, which charge voltage is chosen. If 12Volt is selected, but a 6Volt battery is connected, the LCD will show "Batt Volt Low" message.